프로젝트 들어가기 전에 블로그들 참고하기
- MariaDB 설치 및 테이블 생성
- Spring Boot에서 MariaDB 데이터소스 설정
- Model, Repository 클래스 생성 및 어노테이션 설정 / 게시판 데이터 조회 후 화면에 출력
mac에서 mariadb 참고
https://wonpaper.tistory.com/399
[MySQL] Mac 에서 mariaDB 설치하기
맥에서 mariaDB 를 설치해본다. 맥전용 설치 파일이 없어서, 약간 귀찮은 과정을 거쳐야한다. Homebrew 으로 mariaDB 를 실제 설치하는 방식이다. 1. X-Code 설치 - Homebrew 를 설치가능하도록 해준다. : 터미
wonpaper.tistory.com
https://mariadb.com/kb/en/installing-mariadb-on-macos-using-homebrew/
Installing MariaDB Server on macOS Using Homebrew
Installing MariaDB on macOS via the Homebrew package manager, the "missing package manager for macOS"
mariadb.com
https://eunhee-programming.tistory.com/13
(Mysql) 데이터베이스 삭제/ 테이블 삭제
데이터베이스 삭제 mysql> show databases; //모든 데이터 베이스 보기 +--------------------+ | Database | +--------------------+ | book_db | | bookdb | | ehdb | | information_schema | | mysql | | perfo..
eunhee-programming.tistory.com
https://velog.io/@woongstaa/Database-MySQL
Database | MySQL
MySQL은 세계에서 가장 많이 쓰이는 오픈 소스의 관계형 데이터베이스 관리 시스템이다 다중 스레드, 다중 사용자 형식의 구조질의어 형식의 데이터베이스 관리 시스템으로서 오라클이 관리 및
velog.io
mysql 관련 에러 참고
https://passing-story.tistory.com/142
[MySQL] mysql로그인 오류 / mysql 비밀번호 재설정
[로그인 오류] 유형 1) ERROR 1045 (28000): Access denied for user 'root@'localhost' (using password: NO) - 사용자의 비밀번호가 없을 경우 나타나는 오류 문구, 아래 해결 방법에 있는 명령어들 중 하나를..
passing-story.tistory.com
ERROR 2002 (HY000): socket '/tmp/mysql.sock' (2) 해결하려고 brew services start mysql 함
http://meonggae.blogspot.com/2017/03/db-mac-mysql-1-error-2002-hy000-cant.html [db] mac에서 mysql환경설정 셋팅하기 1편 - 설치 및 접속, ERROR 2002 (HY000) : Can't connect to local MySQL server db, my..
so-es-immer.tistory.com
--------------------------------------------------------
pom.xml에서 JPA 추가(maven repository 사이트 참고 / mariadb maven 사이트 / mariadbspringboot 사이트)
application properties
spring.datasource.url=jdbc:mariadb://localhost:3306
spring.datasource.username=root
spring.datasource.password=1234
spring.datasource.driver-class-name=org.mariadb.jdbc.Driver
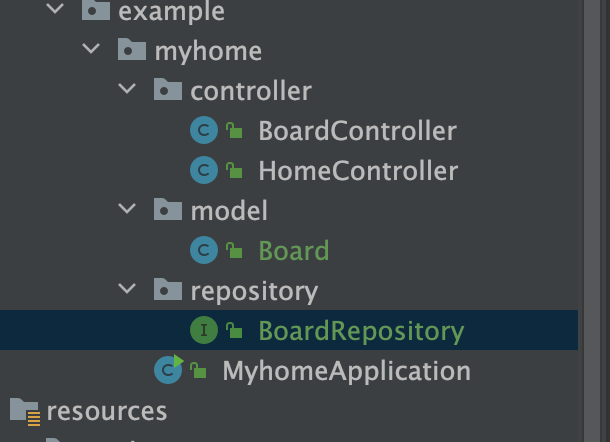
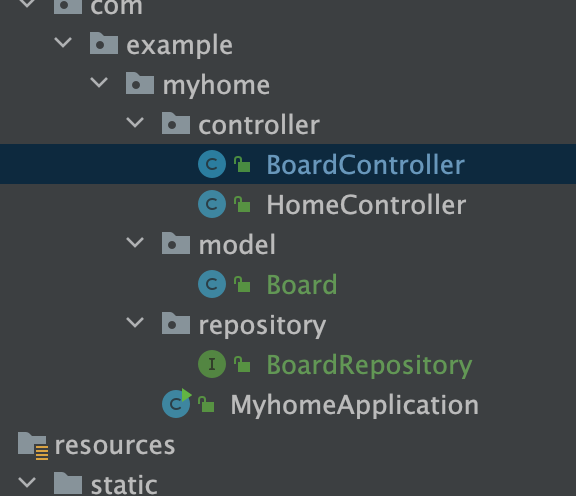
model package에 Board class를 만들어주고 생성(여기서 JPAREPOSITORY 참고)
package com.example.myhome.model;


import lombok.Data;

import javax.persistence.Entity;
import javax.persistence.GeneratedValue;
import javax.persistence.GenerationType;
import javax.persistence.Id;

@Entity
@Data
public class Board {
    @Id
    @GeneratedValue(strategy = GenerationType.IDENTITY)
    private long id;
    private String title;
    private String content;
}
BoardRepository Interface도 만들어준다.
package com.example.myhome.repository;

import com.example.myhome.model.Board;
import org.springframework.data.jpa.repository.JpaRepository;

public interface BoardRepository extends JpaRepository<Board, Long> {
}
BoardController 만든거도 아래와 같이 세팅
package com.example.myhome.controller;


import com.example.myhome.model.Board;
import com.example.myhome.repository.BoardRepository;
import org.springframework.beans.factory.annotation.Autowired;
import org.springframework.stereotype.Controller;
import org.springframework.ui.Model;
import org.springframework.web.bind.annotation.GetMapping;
import org.springframework.web.bind.annotation.RequestMapping;

import java.util.List;

@Controller
@RequestMapping("/board")
public class BoardController {

    // DI => 서버 기동될 때 인스턴스가 들어온다.
    @Autowired
    private BoardRepository boardRepository;

    @GetMapping("/list")
    public String list(Model model) {
        List<Board> boards = boardRepository.findAll();
        // boards 라는 key값에 boards 라는 데이터를 준다.
        // 모델에 담긴 데이터를 thymeleaf를 통해서 사용할 수 있다.
        model.addAttribute("boards", boards);
        return "board/list";
    }
}
iterm terminal에서 mysql table 생성 삽질중..
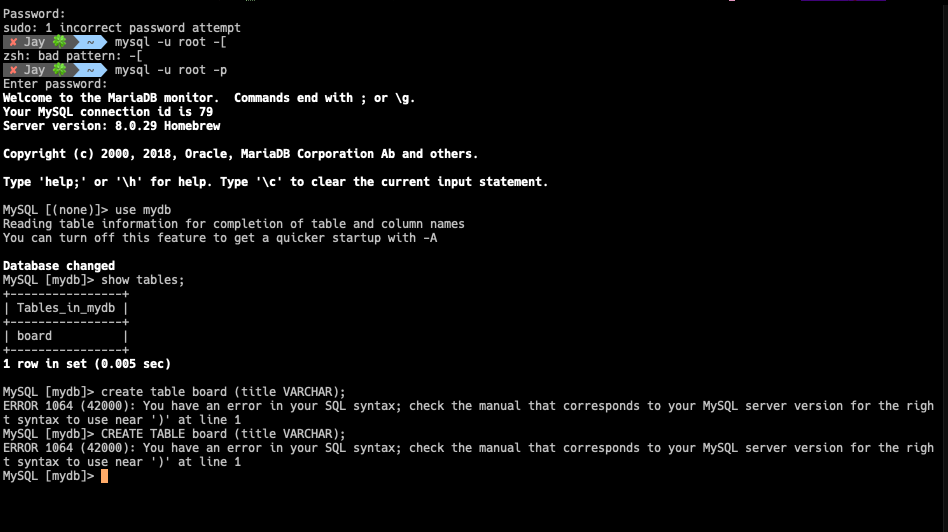
일단 통과 db연동까지 마쳤다.
MySQL [mydb]> select * from board;
Empty set (0.000 sec)
application.properties 세팅
spring.datasource.url=jdbc:mariadb://localhost:3306/mydb
spring.datasource.username=root
spring.datasource.driver-class-name=org.mariadb.jdbc.Driver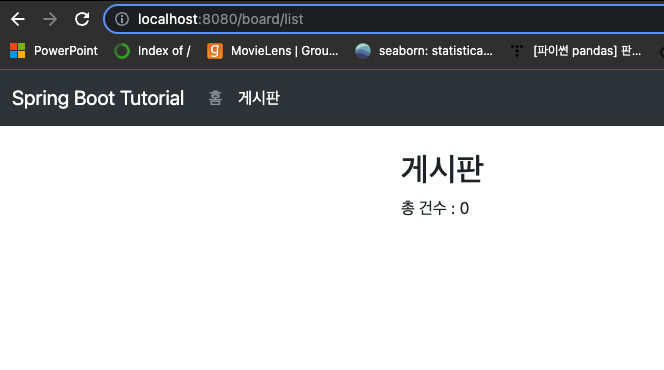
MySQL [mydb]> CREATE TABLE board(id BIGINT(20) NOT NULL AUTO_INCREMENT, title VARCHAR(50), content TEXT(65535), PRIMARY KEY(id));
ERROR 1050 (42S01): Table 'board' already exists
MySQL [mydb]> INSERT INTO board (id, title, content) VALUES (1, '제목', '내용');
Query OK, 1 row affected (0.005 sec)

MySQL [mydb]> select * from board
    -> ;;
+----+--------+---------+
| id | title  | content |
+----+--------+---------+
|  1 | 제목   | 내용    |
+----+--------+---------+
1 row in set (0.005 sec)

ERROR: No query specified
thymeleaf 사이트 참고
bootstrap를 참조하여 list.html을 아래와 같이 작성해준다.
<!doctype html>
<html xmlns:th="http://www.thymeleaf.org">

<head th:replace="fragments/common :: head('게시판')">
    <!-- Required meta tags -->
    <meta charset="utf-8">
    <meta name="viewport" content="width=device-width, initial-scale=1, shrink-to-fit=no">

    <!-- Bootstrap CSS -->
    <link rel="stylesheet" href="https://stackpath.bootstrapcdn.com/bootstrap/4.5.0/css/bootstrap.min.css"
        integrity="sha384-9aIt2nRpC12Uk9gS9baDl411NQApFmC26EwAOH8WgZl5MYYxFfc+NcPb1dKGj7Sk" crossorigin="anonymous">
    <link href="starter-template.css" th:href="@{/starter-template.css}" rel="stylesheet">

    <title>게시판</title>
</head>

<body>
    <nav class="navbar navbar-expand-md navbar-dark bg-dark fixed-top" th:replace="fragments/common :: menu('board')">
    </nav>

    <div class="container">
        <h2>게시판</h2>
        <div>총 건수 : <span th:text="${#lists.size(boards)}"></span></div>
        <table class="table table-striped">
            <thead>
            <tr>
                <th scope="col">번호</th>
                <th scope="col">제목</th>
                <th scope="col">작성자</th>
            </tr>
            </thead>
            <tbody>
            <tr th:each="board : ${boards}">
                <td th:text = "${board.id}">Mark</td>
                <td th:text = "${board.title}">Otto</td>
                <td>Jay</td>
            </tr>
            </tbody>
        </table>
        <div class="text-right">
            <button type="button" class="btn btn-primary">쓰기</button>
        </div>
    </div>

    <script src="https://code.jquery.com/jquery-3.5.1.slim.min.js"
        integrity="sha384-DfXdz2htPH0lsSSs5nCTpuj/zy4C+OGpamoFVy38MVBnE+IbbVYUew+OrCXaRkfj"
        crossorigin="anonymous"></script>
    <script src="https://cdn.jsdelivr.net/npm/popper.js@1.16.0/dist/umd/popper.min.js"
        integrity="sha384-Q6E9RHvbIyZFJoft+2mJbHaEWldlvI9IOYy5n3zV9zzTtmI3UksdQRVvoxMfooAo"
        crossorigin="anonymous"></script>
    <script src="https://stackpath.bootstrapcdn.com/bootstrap/4.5.0/js/bootstrap.min.js"
        integrity="sha384-OgVRvuATP1z7JjHLkuOU7Xw704+h835Lr+6QL9UvYjZE3Ipu6Tp75j7Bh/kR0JKI"
        crossorigin="anonymous"></script>
</body>

</html>
일단 대략적인 게시판 틀은 완료했다.

<참고 :Spring Boot으로 웹 출시까지 #5. jpa를 이용해 게시판 조회하기>
https://www.youtube.com/watch?v=PrI15vZbJr4&list=PLPtc9qD1979DG675XufGs0-gBeb2mrona&index=5
'Spring > SpringBoot' 카테고리의 다른 글
| Spring Boot으로 웹 출시까지 #7. JPA이용한 RESTful API 작성 (0) | 2022.06.02 |
|---|---|
| Spring Boot으로 웹 출시 - thymeleaf에서 form 전송 (0) | 2022.06.02 |
| Spring Boot으로 웹 출시까지 #4. thymeleaf를 이용해 레이아웃 만들기 (0) | 2022.05.31 |
| Spring Boot으로 웹 출시까지 #3. thymeleaf 기본 익히기 (0) | 2022.05.30 |
| Spring Boot으로 웹출시 - thymeleaf를 이용한 화면 작성 (0) | 2022.05.30 |